Imagine if every candidate got a personal response to their application, regardless of whether or not they move forward in the recruitment process.
Now, imagine being able to get an overview of why candidates reject an opportunity or you decide a candidate isn't the right fit. The reasons, the data – oh, the things you could optimise 📈
Well, we can stop imagining now because it's all been made possible with our latest update! We’re making it easier for you to keep candidates in the loop and tabs on why it doesn't always work out.
It's called Reject Reasons!
This update is split in two sections:
1. "Quick reject" gives you more control over how you decide to reject your candidates by customising a reject dependent on what stage of the process they are in, and in which job.
2. Add a reason for the rejection with our new “Reject reasons” feature that keeps tabs on why it didn't work out with a candidate, internally. You can get an overview of this data in "Analytics" to optimise your process.
Using this feature will keep your communication personal and automated – the best of both worlds!
Where do I get started?
Under “Settings,” you’ll find a new tab called “Reject reasons.” Here, add the reasons a candidate decides to reject you or you reject a candidate. These are totally customisable – set reasons that suit your company.
As always, you can find your default reject email under “Message templates.” You can also add your own custom reject email templates to choose from so that you can customise a response based on the job or stage a candidate is rejected in. Click on “+ Message template” Simply name and customise your message and click “Save.” If you want to edit default reject email, click on it, edit it and save your changes.
Quick Reject
You’ll now have two options on how to reject a candidate: “Quick Reject” and “Reject.”
In order to activate “Quick Reject,” you need to add it to the specific stage in your recruitment process you would like to use it in. Everyone who is quick rejected in that stage will be tagged with the pre-set reason for the reject that you set and be sent the pre-set email that you’ve customised.
To add a “Quick Reject” to a stage in your process, click on the “Settings” wheel on the right-hand side of that stage. Then, click on “Quick Reject.” Here, fill in the rules that will be used when you click on “Quick reject” on candidates in this stage.
Reject Reasons
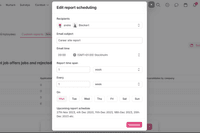
Under “Reject reasons,” select the reason for the reject and choose whether you want to send a reject message. If you choose “yes,” select the email template that will be sent out – remember, you’ve added these in your Settings under “Reject reasons” ✅ Then, select the delay for when you want to send the message.
If you don’t want to use a template and customise the message for this stage in this job specifically, click on “Customise message.” Keep in mind, the message you customise here won’t be saved as a template.
If you want to turn off “Quick reject,” simply go back to the “Quick reject” settings and click on “Turn off Quick reject.”
Click, “Save Settings” and that’s it! 👏 You can see that you’ve activated “Quick reject” above a stage because this icon will show. When you hover over it, it will show you the reason, email, and delay settings.
Now, when you open candidates in these stages, you can “Quick reject” them.
What about the regular Reject option?
If you decide you don’t want to quick reject a candidate, simply click on “Reject” on the candidate card. When you do so, you will get the exact same options as you do when you set up your “Quick reject” settings. This is great if you reject candidates for a different reason than what is pre-set. For example, if you want to customise a personal email, or would like to get back to them within a different time frame than you’ve set in your “Quick reject” settings. In summary, it overrides the “Quick Reject” rule.
When you reject a candidate, whether it be through “Quick reject” or “Custom reject,” you will be able to see the reason for the reject under the job’s “Activity” tab as well as under “Activity” on the candidate card.
But that’s not all.
Reject Reasons in Analytics!
Not only will you be able to see the reject reason under “Activity,” but a summary of data on why candidates rejected/been rejected opportunities! That’s right, data-driven recruitment for the win 🚀
Under “Analytics,” go to “Reject reasons” to view the total amount of rejects, how many have been by the company, by the candidate, and breakdown of the reject reasons (yes, the ones you added!):
For example, you can see how many candidates reject an opportunity because of salary expectations, or how many candidates you reject because of a bad culture fit. Then you know why and what to adjust to grow your team more effectively.
So, why should I start using Reject reasons?
- The better you set up your reject reasons and stick to logging them, the better overview you’ll have in Analytics on why hires don’t work out. This helps you close the gaps between you and candidates to keep your recruitment efforts effective.
- It's easier than ever to respond to candidates with a fitting rejection, and this keeps your recruitment candidate-centric. It gives your employer brand a good nudge and encourages candidates to apply to future openings or recommend opportunities at your workplace to their network. The more personlized, the better. It helps keep both parties smiling. Win-win.
- You save time. Need we say more?
Go on, log in to Teamtailor, and check it out! Save time and treat candidates better. We're here if you need a hand! 👋


![]()
![]()
![]()


